When installing laminate flooring, follow the manufacturer’s instructions

I recently was called to fix a couple spots in a floor that
had started to “heave” at a couple of the joints because there was not ANY
space for expansion. (I can’t be sure if any space was left originally, but it
sure needed more at this point).
It was a rental unit, so the owner didn’t want to spend a fortune, so I
only replaced the worst section, hoping that after I took the pressure off the
edges, the raised joints might shrink down at least a little over time,,,
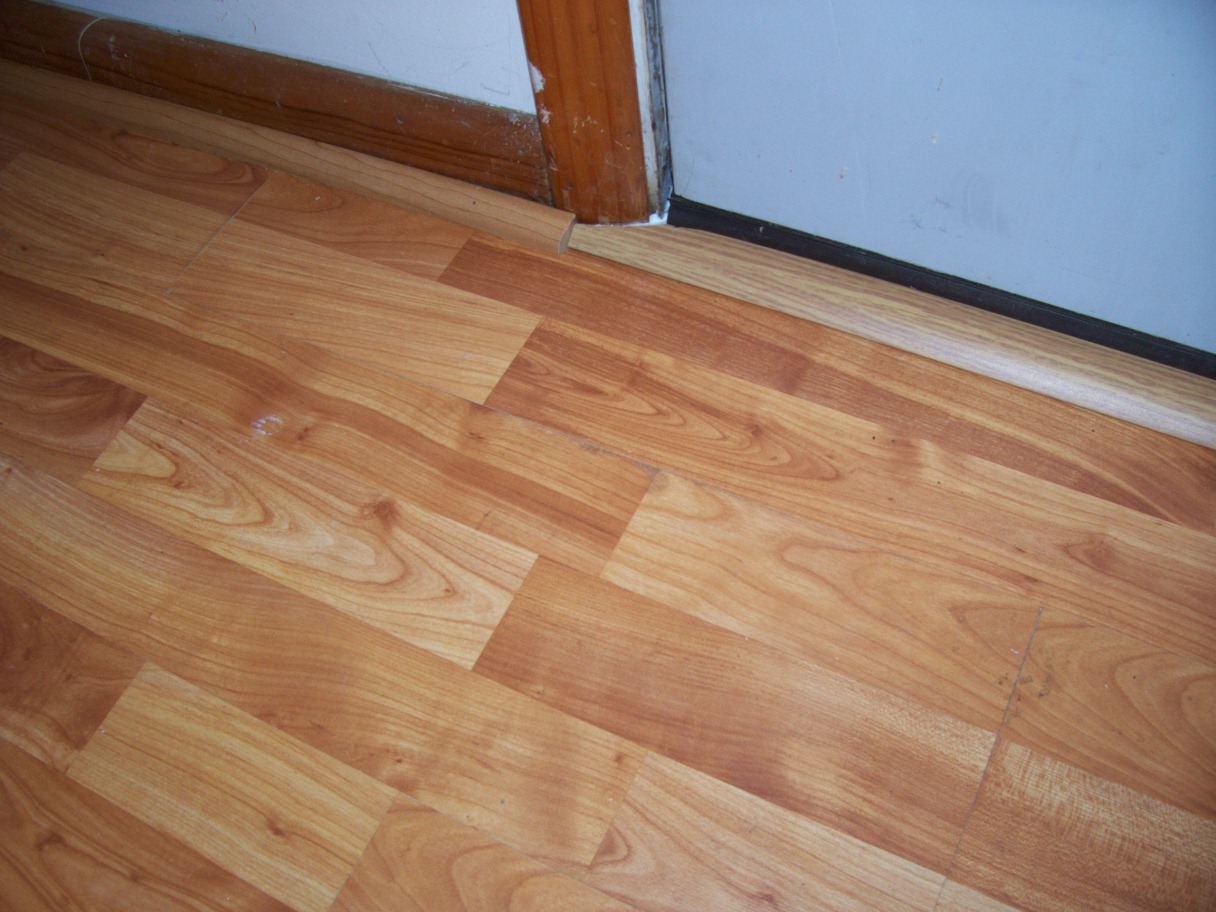
A close look at this photo shows what a nice tight joint the previous installer made between the laminate floor and the door's thresh hold.
The problem is, that is the wrong thing to do.

Here, if you can see it, I've used my Bosch Power Miter Saw to cut back the flooring so there is now a 3/8" gap to allow the floor to expand.

Then, I used the metal trim intended for these types of installation.
In this case, there was a gap between the subfloor and the thresh hold and wall beneath. This meant there wasn't much for the provided anchors to grab hold of. I ended up having to drill a hole in each end of the trim piece and install it with small spiral nails intended for metal carpet strips.
 Near the front door, a joint had popped, probably because of the moisture from everyone's feet.
I would advise to keep joints to a minimal where there is a good chance of water or other liquids getting on the floor.
This joint may of had a chance if there had been room for the floor to expand on the ends.
 I figured it would be easier to rip
the new pieces to fit instead of trying to cut the 12' long run with the
miter saw. So, I had to remove the rest of the pieces along this run...
I figured it would be easier to rip
the new pieces to fit instead of trying to cut the 12' long run with the
miter saw. So, I had to remove the rest of the pieces along this run...
Since the pieces were tight against the wall, (the reason for all the trouble to begin with) I couldn't just lift them out.
The fix - screw a screw part way into the piece being removed, then, use a claw hammer to "pry" the pieces out .

Since it was so close to the edge, I had to find a way to get it nailed in without hitting the trim - see how I did it...
If you need to replace a piece in the middle of the floor, here’s what you do;
Use a skill saw set to the depth of the boards, (or a power
miter box saw, or power trim saw) to make 1 or 2 cuts down the length of the
board. Pry out the cut pieces being careful not to damage the lap joints in the
remaining, surrounding pieces.
 Vacuum out the area to make sure no splinters are left so as
to not allow the new piece to lay flat.
Vacuum out the area to make sure no splinters are left so as
to not allow the new piece to lay flat.
When you put the new pieces in, you won’t be able to get all
the lap joints to “engage.
Not being there to see what kind of joints you have, I
have to give you some general advice here…
On the double edged lap joints, cut the bottom edge off so
the new piece actually only lays on top of the old pieces. Fully engage
whatever lap joints you can. To hold everything together, apply wood glue on
the joints that have been modified.
No comments:
Post a Comment
Feel free to ask questions or make comments.